This isn’t necessarily “the way to do it” but this is how I do it. This isn’t exactly a planned tutorial and it might not get much support once it’s published but if you were curious, here you go. 🙂
Step 1 – What do they want?
I’ll be using CeruleanSilver’s request as an example.
Creature’s Name: Aster
Creature’s Gender: Female
Head: Siamese Norn
Body: Fallow Norn
Arms: Siamese Norn
Legs: Magma Norn
Tail: Treehugger Norn
Color: Pale blue
We can use this information to determine what slots the different parts use.
Fallow – Norn K
Magma – Norn E
Siamese Norn – Norn L
Treehugger – Norn H
Step 2 – Get a basic sprite.
Now I can open up the Genetics Kit and start working. I assign the different parts the appropriate sprite and import an egg of the appropriate gender into the game. I do this in a world that has Norn Poser and Green Screen installed.
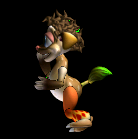
Once I get the creature into pose, I set it in front of the Green Screen and instantly age it to adult by entering “targ norn ages 4” into the console.
I then take a picture that I move into MS paint and I change the backdrop from whatever the green screen’s color was to black, as shown here. You can still see the green through her hair and other parts of her sprite.
 Usually, I name this file “solazy-0”. Heh. While in paint, I go ahead and save this file as a .bmp to prepare it for Sprite Builder. Once I open it in Spritebuilder, I simply name it “z” and move the new z.c16 into my Docking Station/Images folder. I overwrite the old file.
Step 3 – Using the sprite to get a desired color.
Once z.c16 is in place, I enter this script into the console in the game to inject the image into the game as a movable agent.
new: simp 1 1 12345 “z” 0 0 500 attr 3 mvto mopx mopy

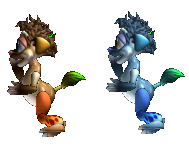
Seeing double? Not quite. The one on the right is just a sprite and I can freely change its color now. Once I release her, the Creature on the left is free to move around and I can work with the sprite.
With the hand pointing at the sprite, I can play around with TINT, which is the command that I use to test out different color values to try to get a desired effect.
targ hots tint x x x y y
The first three xs are the Red, Green and Blue values, respectively. The two ys are the Rotation and Swap, respectively. The way I like to ‘tamper’ with these values is to start from the default, middle value (128) and change the different values to numbers between 1 and 255. I never go below 1 because it throws blank graphics and I don’t go above 255 because that can’t be replicated in the Genetics Kit.
CeruleanSilver wants Pale Blue. Let’s try some commands now.
 Tint 128 128 128 128 10
I played with a few options before arriving at my first blue. This is already a pleasant shade but I wanted to see if I could get something a little more pale.
 Tint 150 150 150 128 10
That’s a little better!
Step 4 – Making the creature match the sprite.
Now that I have the values I need, I open the Genetics Kit again and sort the genes by description.
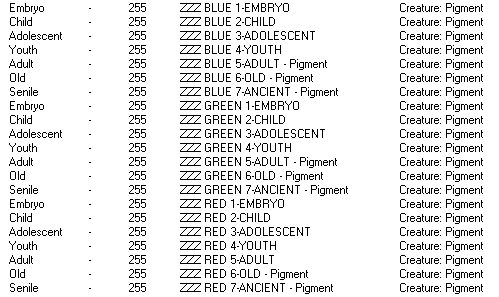 To save time, I added genes that were missing for different ages and renamed them according to color. To make them all appear on the bottom, I added ZZZ to the beginning of each of the pigment gene names. If I hadn’t added the new genes, colors wouldn’t have transitioned well from age to age. Anyway, Now I need to edit these in the following way. All of the Pigment genes shown above would need to be set to 150 on the slider. Lucky me that the genes all share the same value.
As for the Pigment Bleed Genes, I only need to reduce the Swap slider down to 10. Those are easy to find, too. I simply sort by type again and look for the Pigment Bleeds. Let’s see what these edits produce. If I’m lucky, the baby that hatches will match the picture.
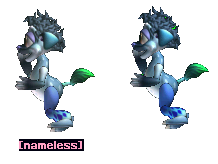 She’s certainly very close! Once I’m happy, I name the creature and assign it a tag. I take one last picture of the creature in pose and then I take it to photoshop to give it a clean outline and transparency.
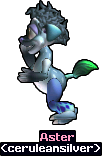 At this point, I save the .gen file as norn.WhateverTheCreature’sNameIs and then update the first post of the Wolfling Run thread. The two creatures used to make this .gen file are removed and to remove the remaining sprites, I use this script.
enum 1 1 12345 kill targ next
Running this makes is to that I can overwrite z.c16 when I get to work on the next creature.
I hope you found this interesting!
