
Hey, didn’t I tell you I’d have new content for this blog? Today I’m putting together a tutorial for you all on how to use EasyPray to create an injectable agent. This is NOT a CAOS coding tutorial, though I might make one of those one of these days. Lastly, I’m using Amaikokonut’s autotab.cos for this tutorial with her permission. Actually, go grab a copy of autotab now so you can follow along.
If you’d simply like a copy of the agent, you can find it at my Downloads page.
Things you’ll need
Creatures Exodus or Docking Station (free)
This may also work for C3 standalone, but I haven’t tested.
EasyPray – Comes with Installer
PrayBuilder – Read Wiki for Instructions
autotab.cos
Got all that? OK! Let’s go.
It doesn’t matter where you put autotab.cos at this point. When you compile the file into an agent, it will place that agent file into the same location that autotab.cos is in. From there, you can move it to your My Agents folder.
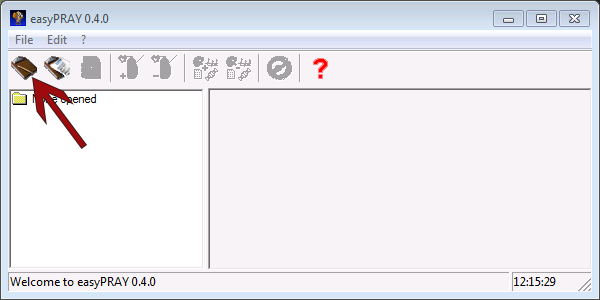 Once you’ve got EasyPray installed and it knows where PrayBuilder is, go ahead and click on the empty clipboard icon to start a new project.
This will open a new window with the options “Agent(s)”, “Egg” and “Nothing”. Nothing will close the window. This time, because you’re making an injectable agent, you want to select “Agent(s)”.
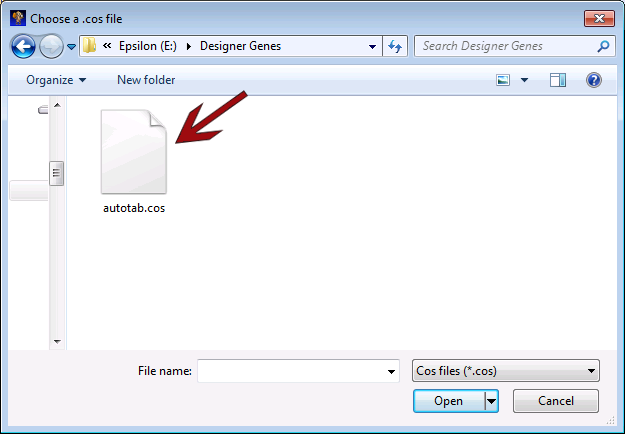 Once you do, it will ask you to find the directory with the .cos file you want to compile into an agent. Once you find autotab.cos, select it then click “Open” at the bottom.
Another menu will appear with the options “C3”, “DS” and “C3 and DS”. The first option means that you’re making this agent for C3 standalone. The second is for Docking Station standalone and the third is for Creatures Exodus. Because I’m running Exodus on my computer, I’ll be choosing C3 and DS. It also gives me the opportunity to show you how to create agents for both versions.
 This is what EasyPray should show you now. In the left side of the window, you can see “autotab” as an expandable menu. On the right side you see the pray file that the program has generated for you. We’re going to edit this so that I can show you how to change the name of autotab in the Injection menu. Expand “autotab” by pressing the plus symbol next to it.
There should be 3 items inside. The first is “Creatorinfo” which we’ll be editing today. Next is “Cosfile” which shows you the CAOS inside of the agent we’re making and “Additional files” would ordinarily hold things like sprites and sound effects that would be packed into the agent. Here, there are no files included so don’t worry about it. Click on “Creatorinfo”.
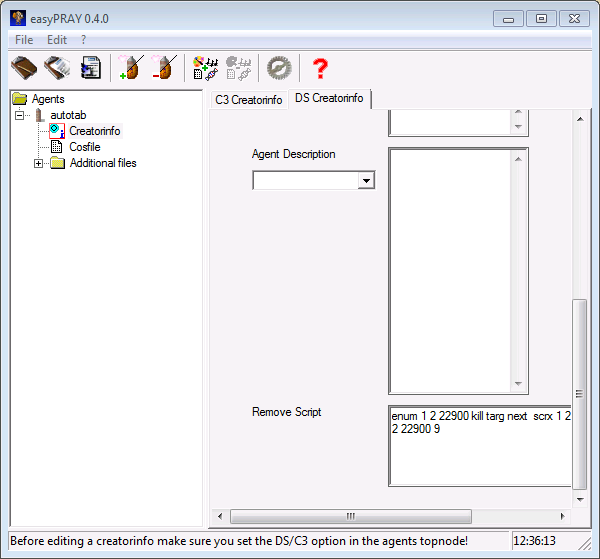
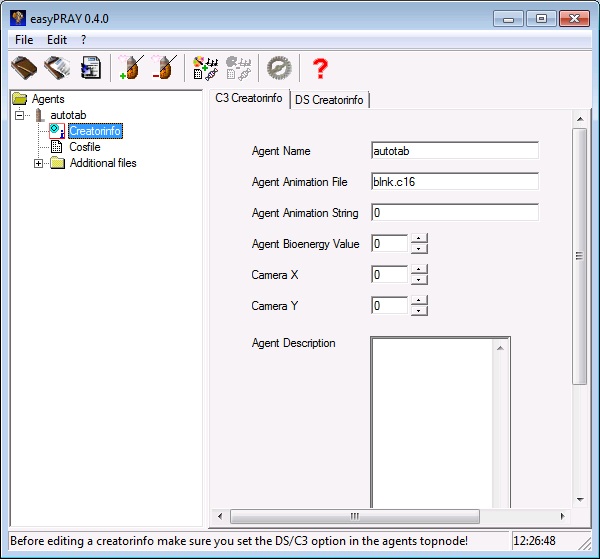 This is the Creatorinfo screen, which we’ll be editing. There are two tabs at the top labelled “C3 Creatorinfo” and “DS Creatorinfo”.
In the C3 Creatorinfo tab, you’ll find the Agent Name and Agent Description. These things will appear only in the C3 injector menus. In other words, this will not be available in the DS menu in the injector screen if you are using only Docking Station. At this point, it’s important to change the name of the agent. Don’t worry about that, though! We’ll make sure the agent is DS friendly in the next tab.
For now, change the agent’s name to AutoTab. We’re capitalizing it because the game puts lower-cased agents at the end of the menu and this helps keep your lists organized.
For “Agent Description” enter something like “This agent will automatically cycle through all the creatures in your world.
CAOS by Amaikokonut
Compiled by <your name>” or something to that effect. I think it’s courteous to include the original creator’s name in the work if you’re going to make an adaptation from it. 😉
Once you’ve finished that, you’re done with this tab. The program has already added a Remove Script for you.
Click on the DS Creatorinfo tab.
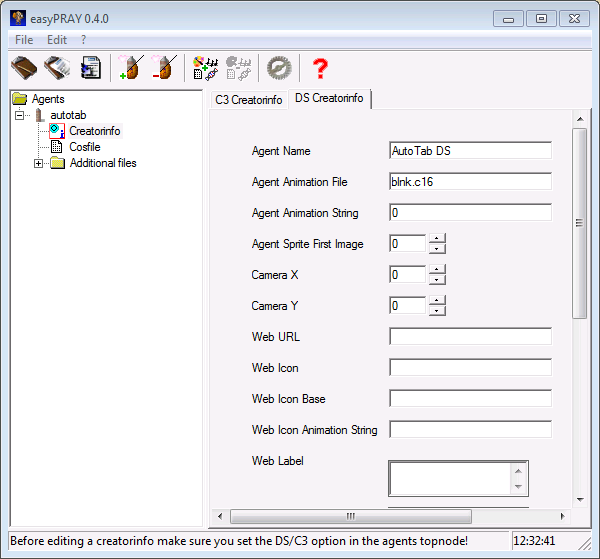 You’ll notice that the DS tab has a lot more forms to fill out than the C3 tab. It’s very simple, though so don’t get discouraged just yet.
As before, we’re going to name the agent “AutoTab DS”. We’re adding DS at the end to let players know that this is the DS version of the agent.
Next, you can add information like the URL of the creator’s site. In this case, I used Naturing::Nurturing’s url but you can actually leave all the “Web” forms blank without any problems.
 If you scroll down a bit, you’ll see the “Agent Description” form below the Web Label form. There’s a drop down menu to the left. Don’t enter the agent’s description just yet! Instead, click on the dropdown menu and select “en”. You’ve probably guessed that this is the language selector! You can use the same description as for the C3 and if you’re multilingual, you can fill out the description in other languages, too!
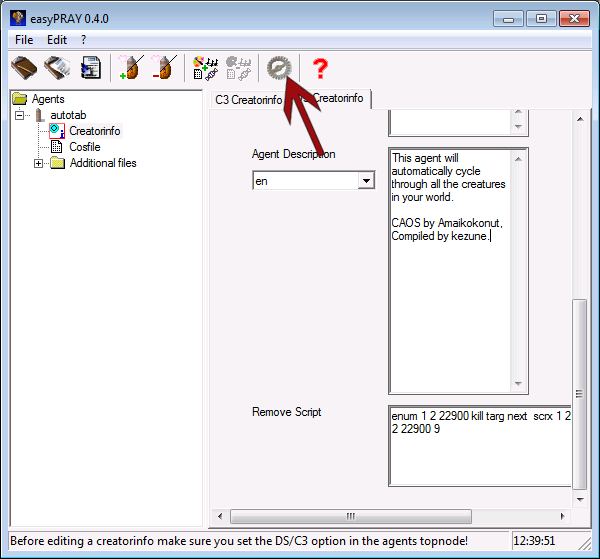 When you’re happy with the name and description, click on the gear at the top of the screen to Compile the agent. It will ask you to save the PRAY template file. I usually use the same folder as the .cos file is in to keep things simple. Leaving it named agent.txt is fine but if you’re using the same folder for multiple agents, consider naming it autotab.txt.
If there are no errors, a window will pop up saying “Compiling successful :-)” and you’re done! Click OK and close EasyPray.

Inside of your agent’s folder you should find autotab.cos, autotab.txt, prayoutput.info and autotab.agents. The agents file is the one you’ll want to test. Move that into your My Agents folder. Either your C3 or DS version should be fine since this file will support either.
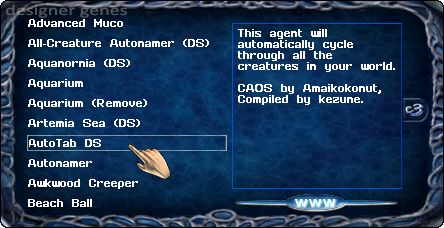 Open your game and go to your agent injector. I’ll be showing you the DS version. Once you’ve opened up the injector screen, test your agent out by clicking on it. The name and description should be what you added and when the agent is injected, it should change the selected creature at regular intervals. Just wait around for a minute to see if it works. Once you’re sure it works, remove the agent and wait around. If it doesn’t change to a different creature after a while you’ll know removal worked, too.
Anyway, that’s how you turn a .cos file into a .agents file. Simple stuff!
I hope you enjoyed this! If you have ideas for other tutorials you’d like to see in the future or have questions about this tutorial, don’t hesitate to leave a comment. Happy Developing, everyone!
Wow, this is a wonderfully thorough guide. Thanks for taking the time to go into such detail and include pictures of each step. I’m sure a lot of people will find it helpful!
That’s the hope! Thanks again for letting me use AutoTab for this. 🙂
What a great tutorial! This was easy to follow, even for someone like me who hasn’t done much with C3/DS files. Thanks for starting off with simple steps, too. Sometimes I question if my tutorials are too basic, yet it seems like the simpler ones are really useful when it comes to getting new people interested in developing. I’m sure this will be really helpful!
And dare I say it? I’m falling behind on keeping up with your blog because it’s so active, and there’s so much going on in the community all of a sudden. This is just about the best “problem” anyone could ever have! Ha!
Hah, Jessica, I was thinking the same thing. So many blogs and so little time! This is the most excitement I’ve had in the CC in years!
Don’t you worry. I’ll be taking breaks on (most) weekends. 😉